A guide on how to do a scrapbook about your grandmother.

Scrapbooking is a wonderful way to highlight the importance of family history and record our loved ones before they are gone forever. Creating a scrapbook about your grandmother allows you to preserve and share her memories with future generations. In this essay, we will provide a step-by-step guide to help you create a scrapbook about your granny that will serve as a lasting tribute to her life and personality.

Step 1: Gather Materials

Before you begin your scrapbook project, you will need to gather the materials you will need. You will need a scrapbook album, acid-free paper, scissors, adhesive, embellishments, and any photos or memorabilia you would like to include. When selecting your materials, consider the theme and color scheme of your scrapbook, and choose materials that complement that vision.

Step 2: Plan Your Layout

Once you have your materials, it's time to plan out your scrapbook layout. This involves deciding what story you want to tell and how you will use your materials to creatively illustrate your grandmother's life and personality. Consider using a combination of photos, handwritten notes, and decorative elements to create a cohesive and visually interesting design.

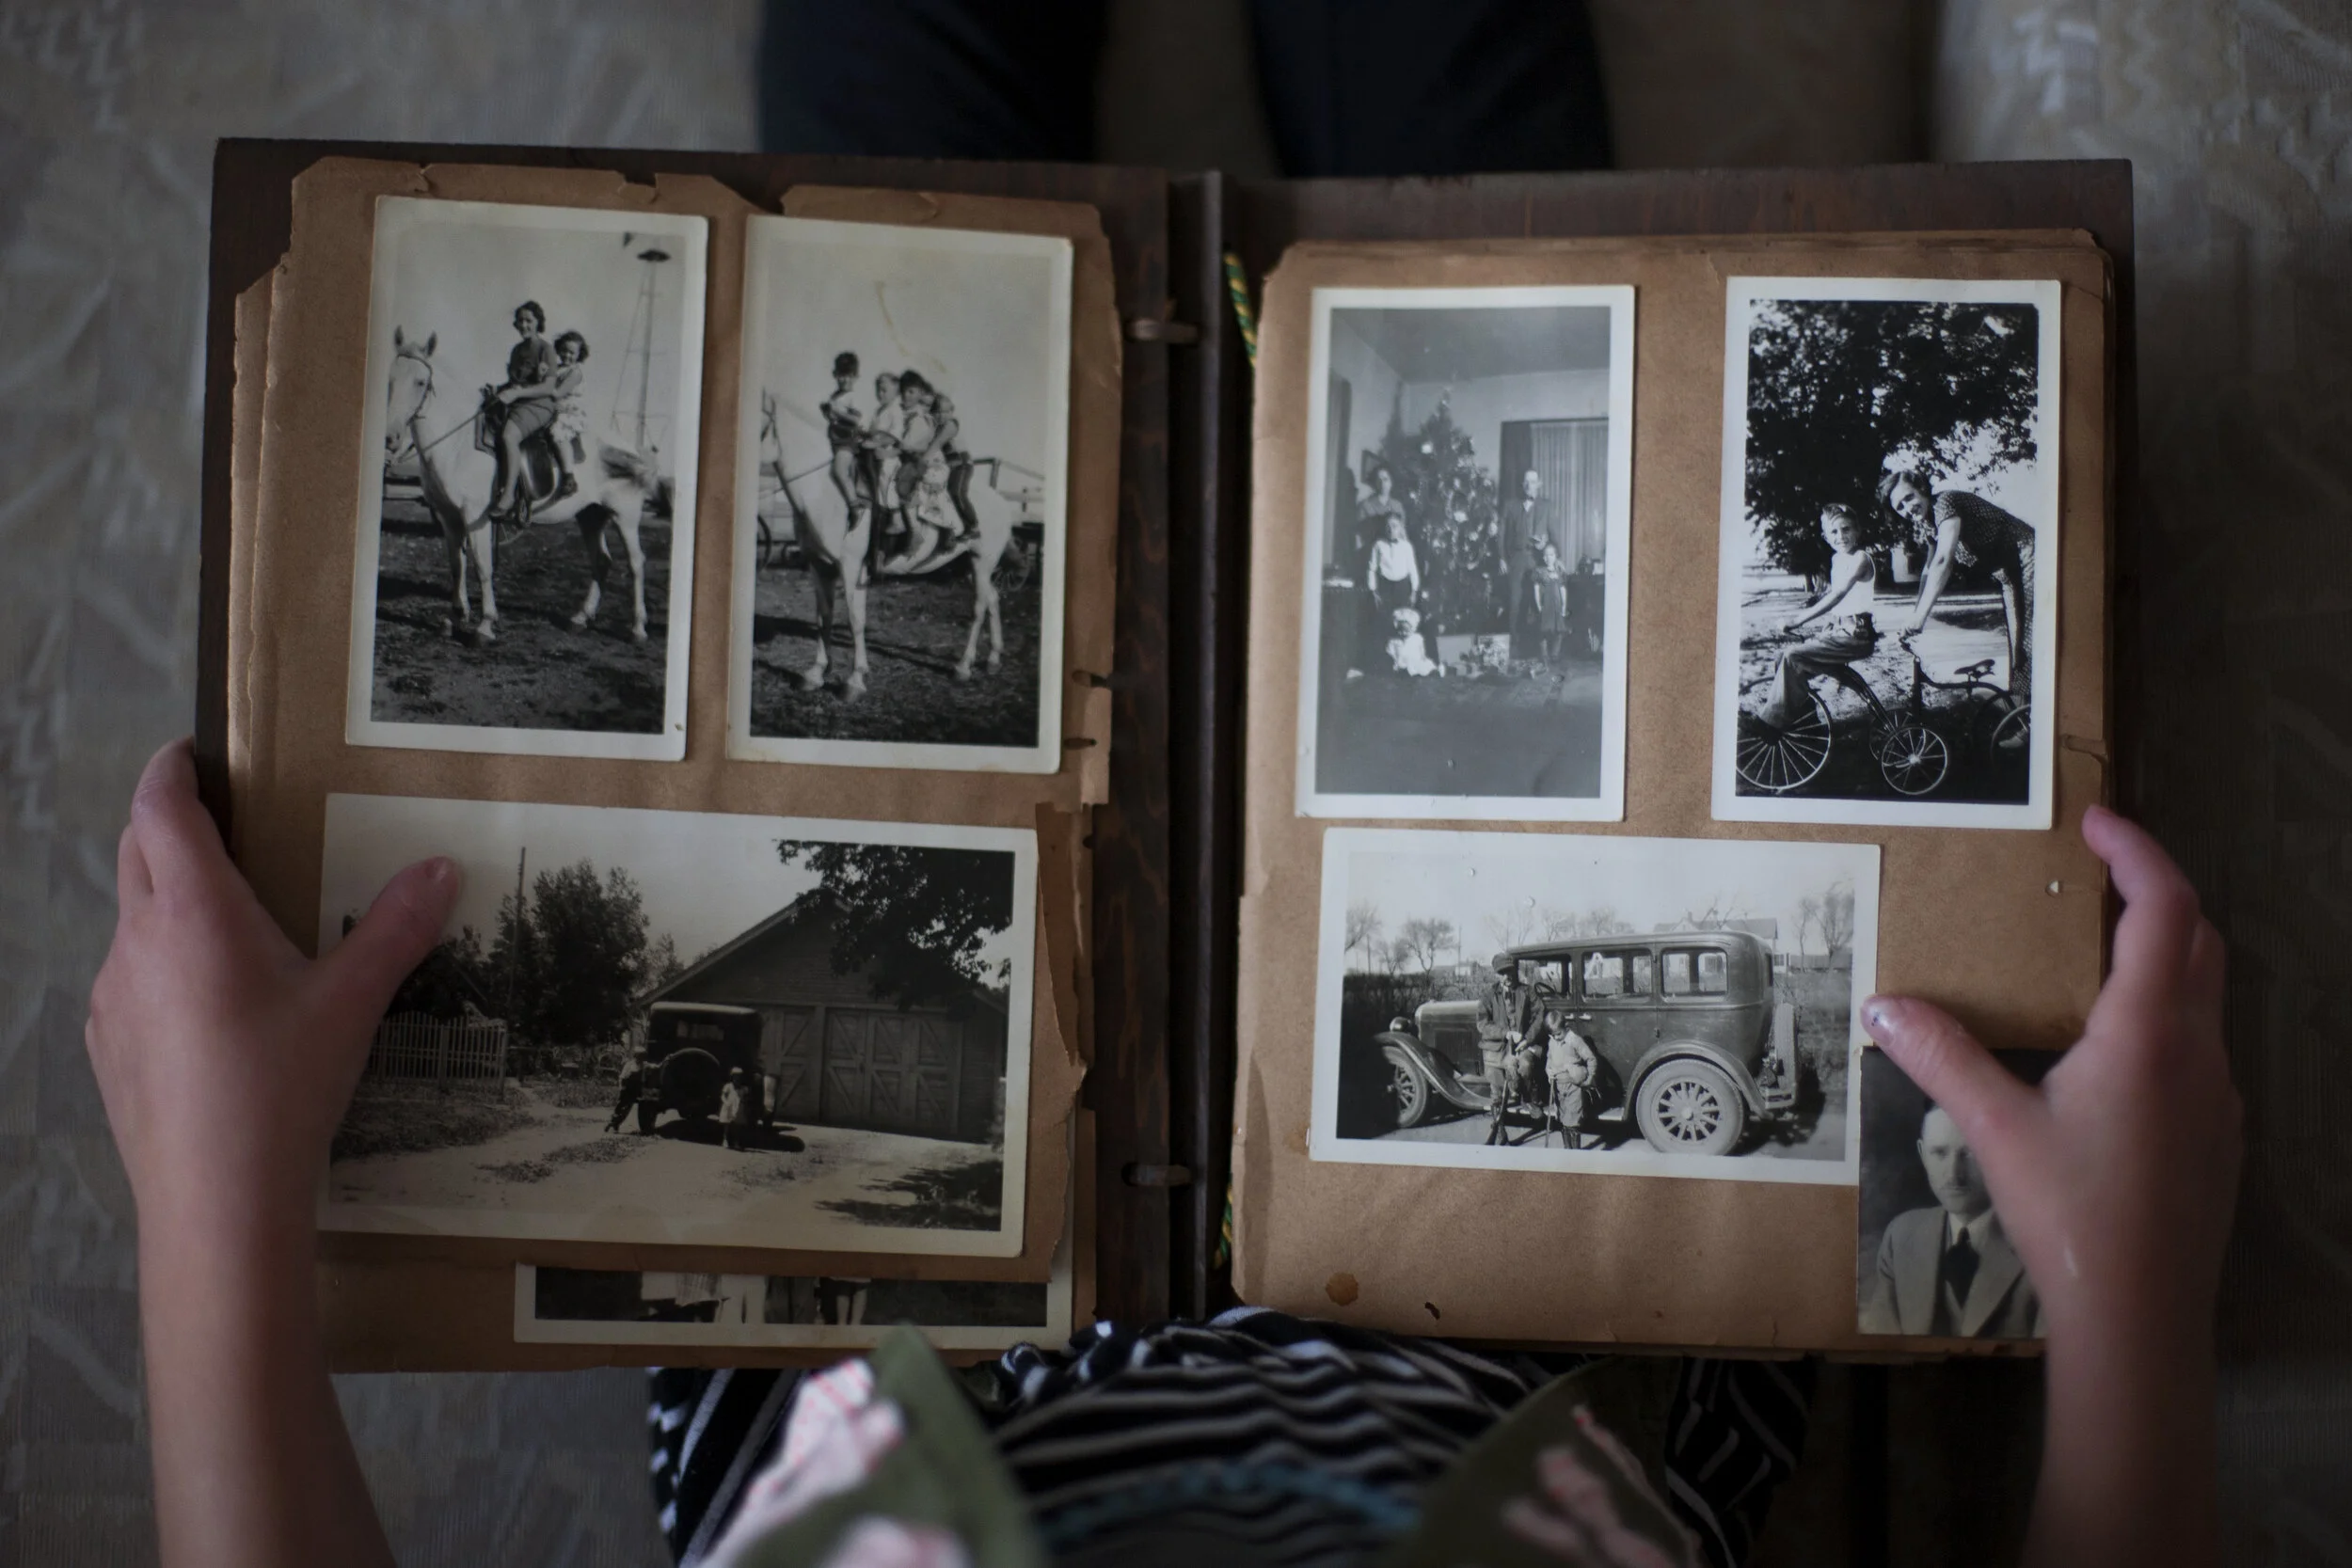
Step 3: Gather Photos

Photos are a critical element of any scrapbook project. As you gather photos for your grandmother's scrapbook, look for images that capture important moments in her life, such as her wedding day, her children, and memories of her childhood. Candid snapshots that capture her personality and character are also great additions.


Step 4: Choose a Title

Select a title for your scrapbook that reflects the essence of your grandmother. The title should be memorable and unique, serving as an inviting introduction to your project. Examples of possible titles include "Remembering Granny," "A Life Well-Lived," or "Keeping Memories Alive."

Step 5: Begin Building Your Pages

With your materials, layout plan, photos, and title in place, it's time to start building your scrapbook pages. Begin with your title page and continue through each spread, paying close attention to balance, color, and overall design. Consider incorporating decorative elements like ribbons, buttons, and stamps to add texture and dimension to your pages.

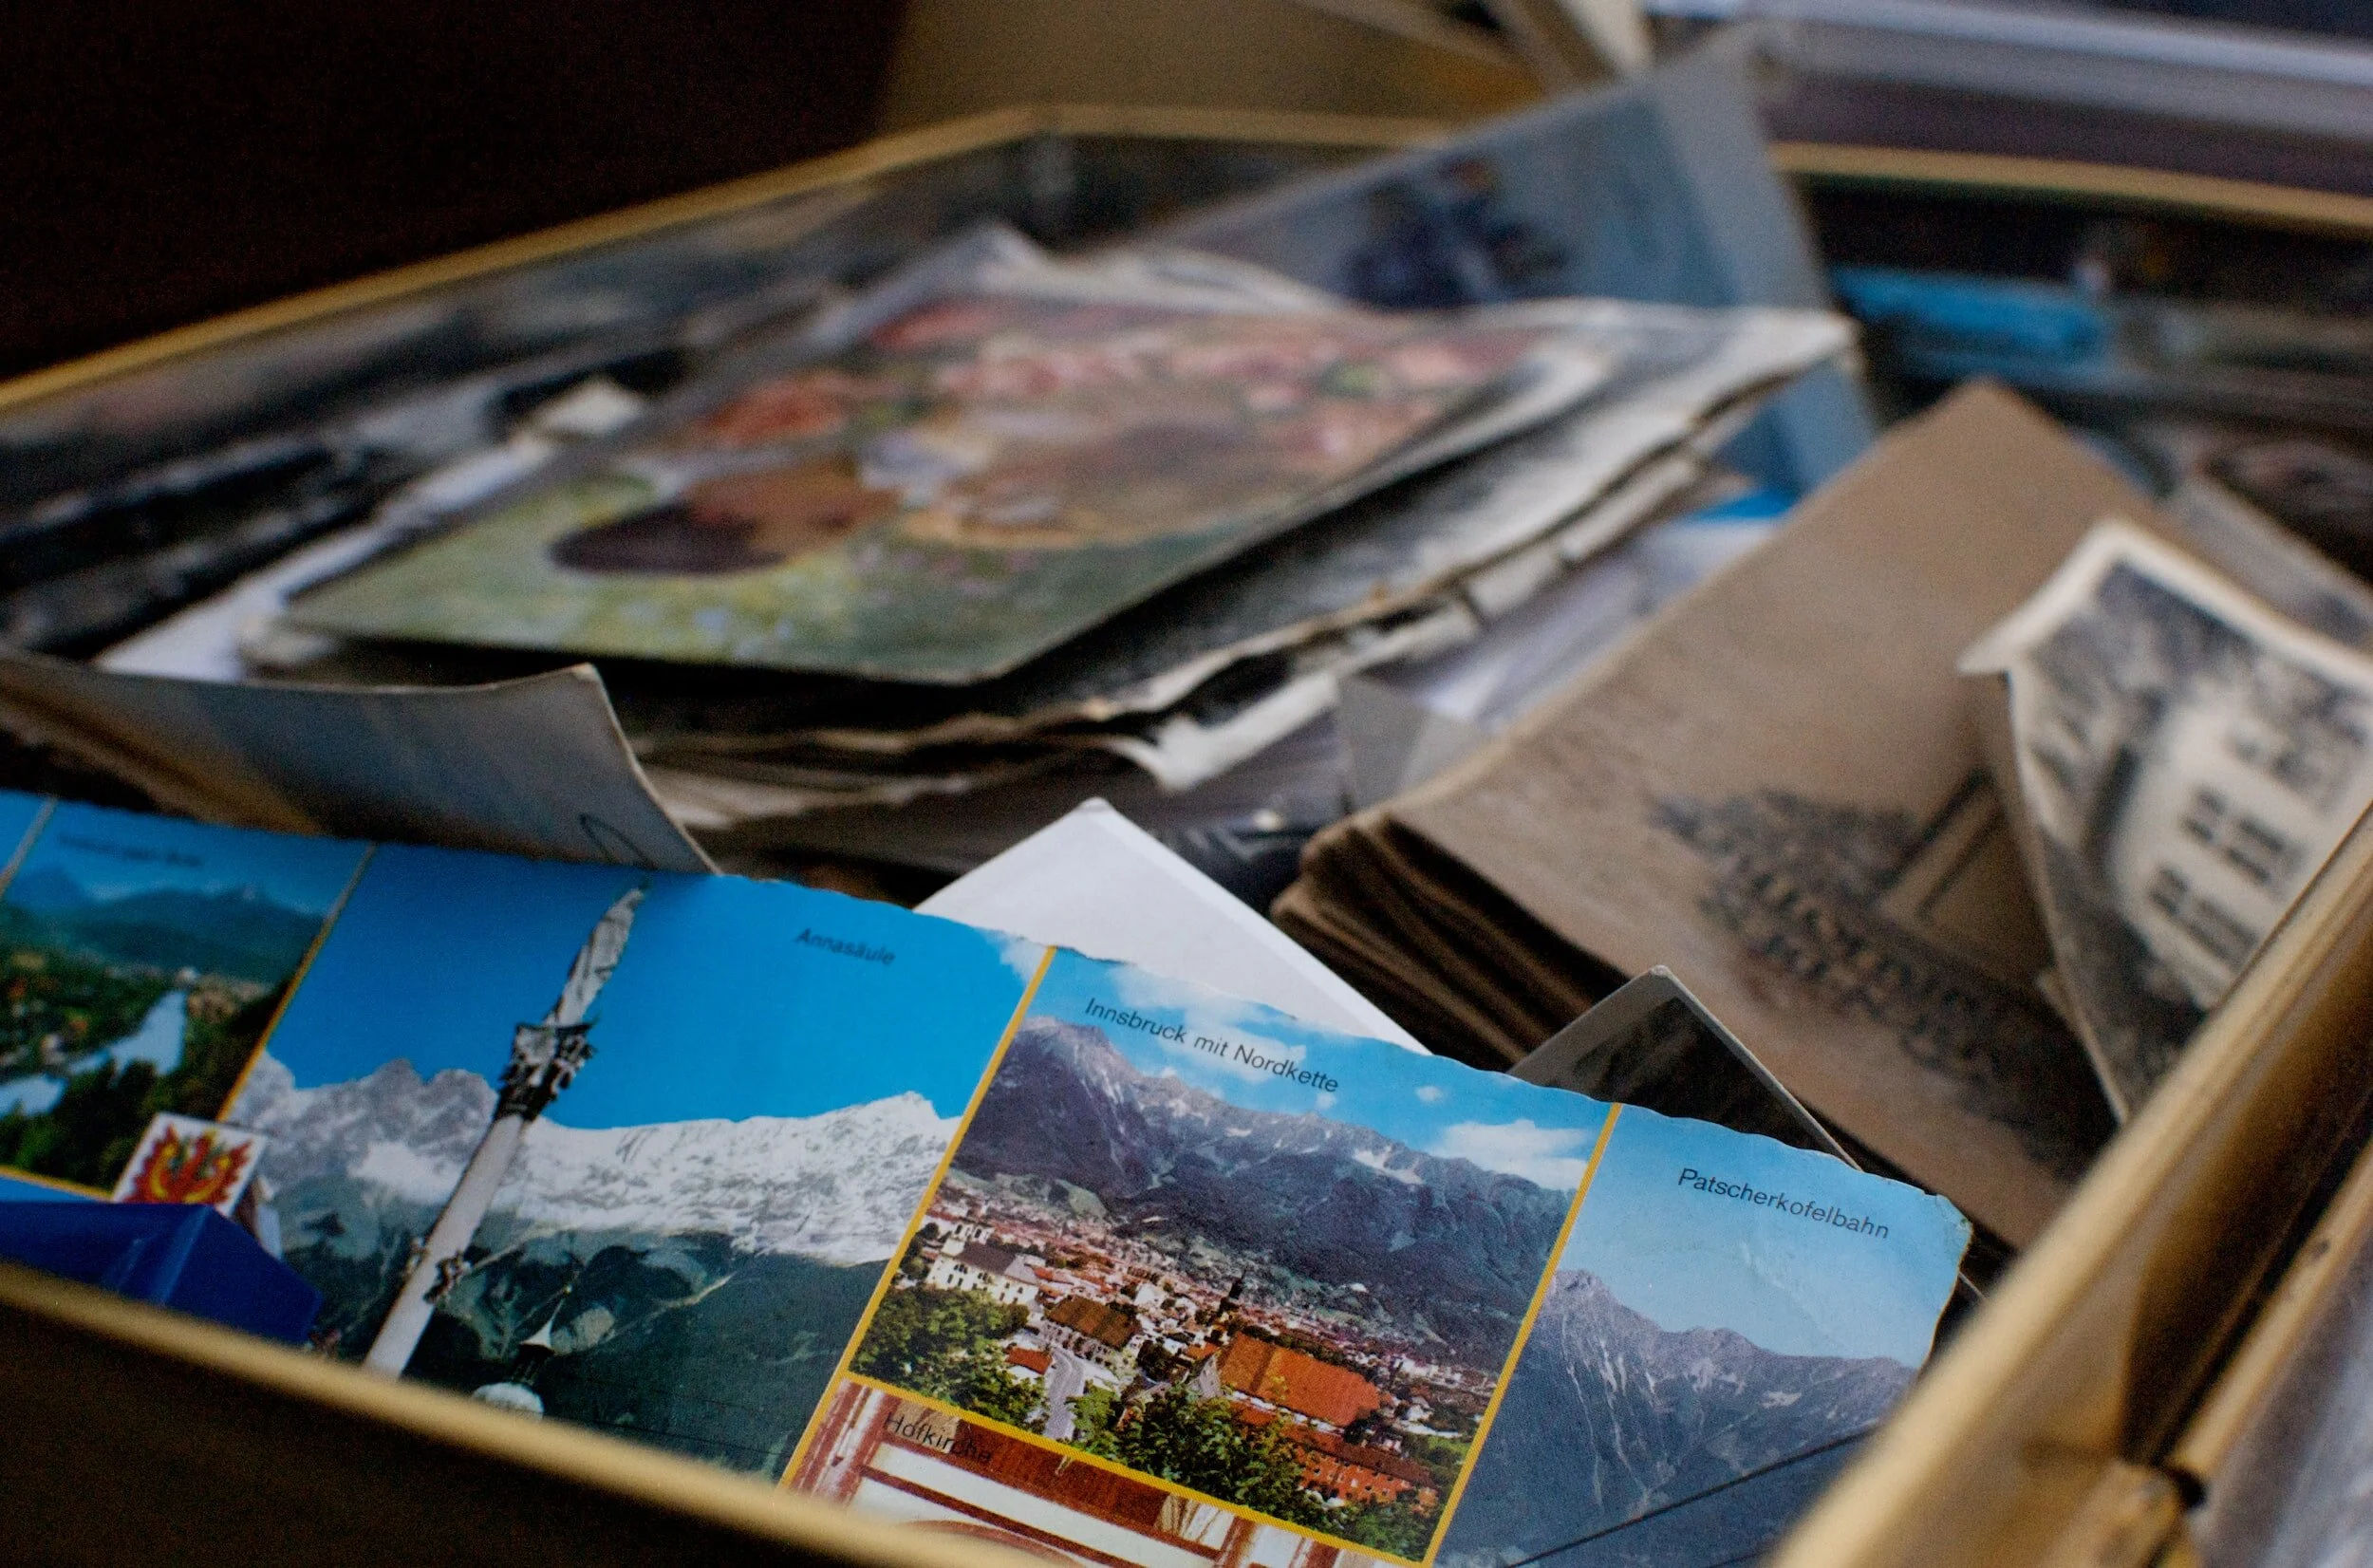
Step 6: Incorporate Memorabilia

Incorporating memorabilia into your scrapbook adds a personal touch and helps to tell your grandmother's story. Examples of memorabilia you can include are old letters or postcards, ticket stubs from her favorite concert or event that she attended, or even a lock of her hair from her youth.

Step 7: Journal Your Memories

In addition to photos and decorative elements, consider adding personal journaling to your pages. This could include handwritten messages from other family members fondly complimenting Granny.

Step 8: Organize and assemble the book:

Once you have completed all the pages, assemble them in the scrapbook album in the desired order.

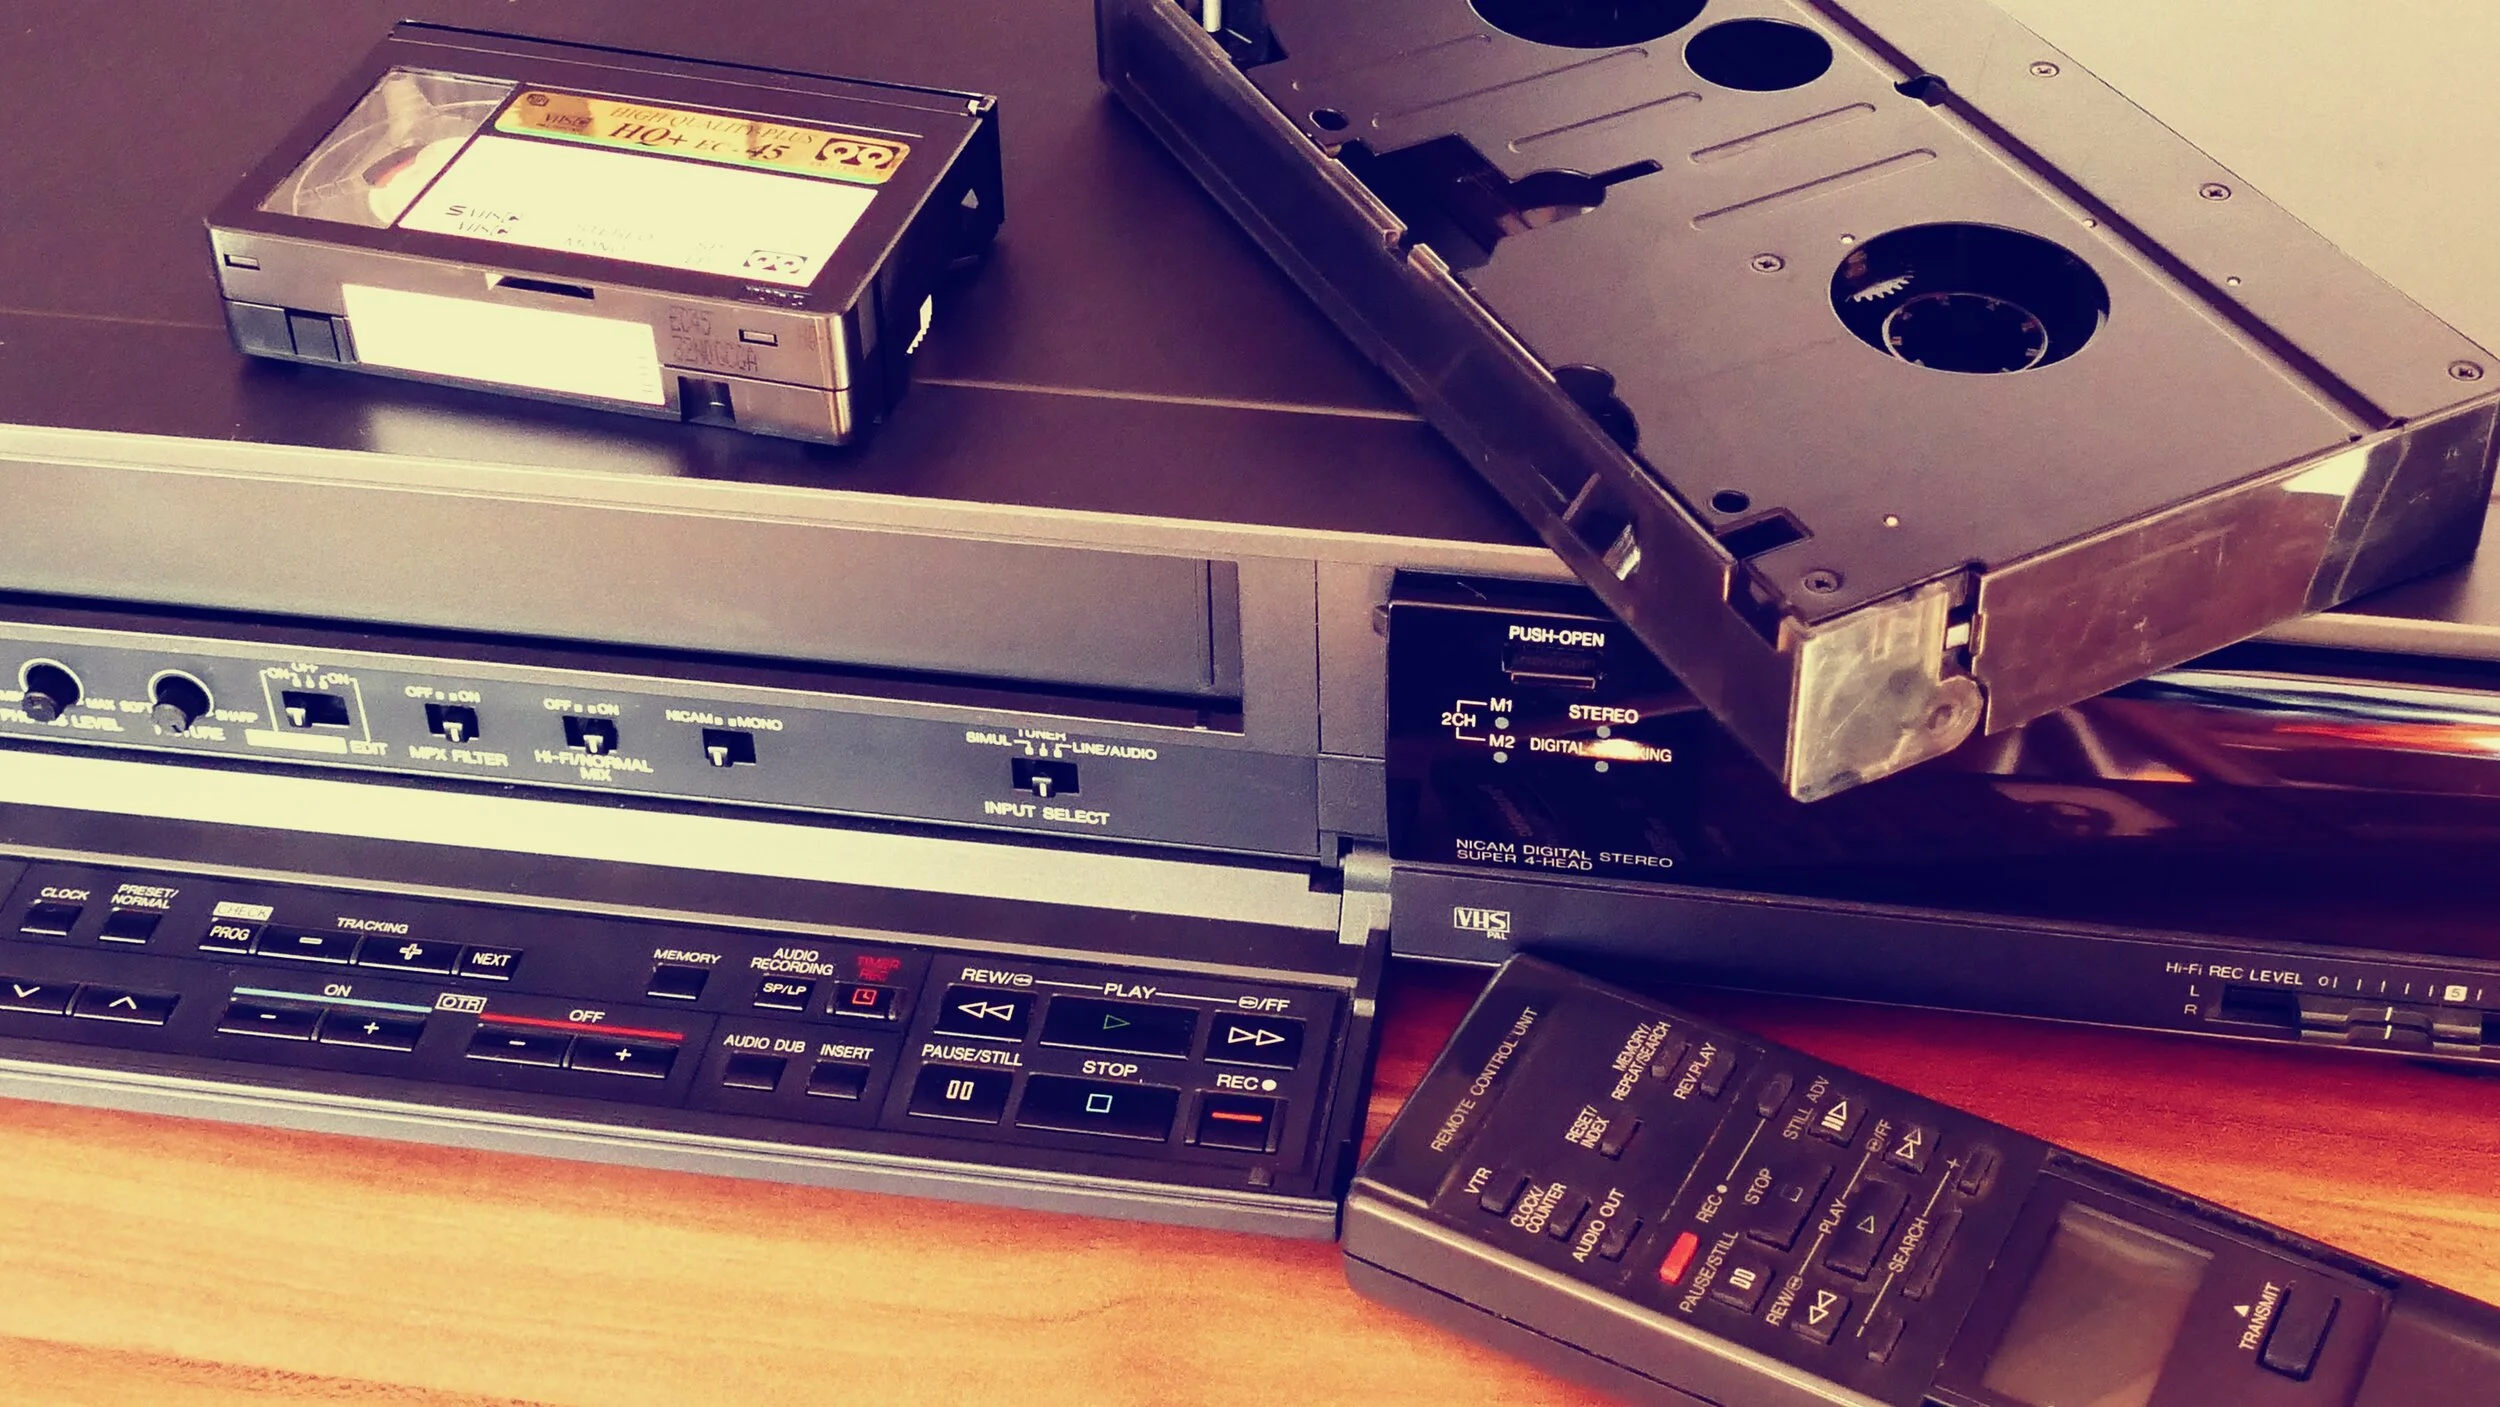
Sit with Granny and go through the book. Make sure to set your camera/smartphone to record video and let her reminisce and share her life stories as she enjoys her beautiful book!

To learn how to film your grandparent with a smartphone click here.

Common misconceptions about family history research.

Common misconceptions about family history research.

Family history research is a fascinating and rewarding pursuit, but it can also be fraught with misconceptions and misunderstandings. In this essay, I will address some of the most common misconceptions about family history research, and why it is so important to record our elder stories.

One of the most common misconceptions about family history research is that it is overly complex and time-consuming. Many people assume that researching their family tree will require a great deal of technical expertise or specialized knowledge. However, this is not necessarily the case. While there are certainly methods and techniques that can improve your research results, anyone can get started with family history research using basic research skills and common sense.

Another common misconception is that family history research is only relevant to a select few people who are interested in their ancestry. However, this overlooks the fact that family history research has become increasingly popular in recent years, with many individuals looking to connect with their family roots and identify their ancestors. Furthermore, recording family stories can help to pass on important information and traditions to future generations, and preserve the legacies of our ancestors.

One misconception that is particularly harmful is the belief that family history research is only for certain groups of people, such as those with a specific ethnic or cultural background. This can lead people to overlook the diversity and complexity of their family history and miss out on important connections, stories, and cultural traditions. In reality, family history research is relevant and valuable to everyone, regardless of their ethnic or cultural background.

Finally, there is a common misconception that family history research is only about collecting names and dates. However, this overlooks the rich and diverse stories that are at the heart of family history research. By recording the stories and experiences of our elder relatives, we can gain insight into their lives and the challenges they faced. Additionally, recording elder stories can help to identify ancestors in old photos, and provide important context and clues for future research.

In conclusion, family history research is a fascinating and rewarding pursuit, but it is not without its misconceptions. By dispelling these misconceptions and emphasizing the importance of recording our elder stories, we can encourage more people to engage in family history research and preserve the legacies of our ancestors for future generations. After all, our family history is an integral part of our personal and cultural identity, and it is up to us to preserve and celebrate it.

Unveiling Roots: Tracing the History of Family Trees

Unveiling Roots: Tracing the History of Family Trees.

Family trees are a common way to visualize and understand one's family lineage and history. The practice of creating family trees goes back centuries, and the roots of genealogy research date back even further.

In this blogpost, we will explore the history of family trees, how the practice has evolved over time, and the importance they hold for families and societies.

The practice of genealogy research can be traced back to ancient times. In many cultures, keeping records of one's ancestors was a common practice, and these records were often passed down through oral tradition. For example, in ancient China, family surnames were passed down from generation to generation, and the genealogy of each family was recorded in a book. In some cultures, such as the Jewish people, genealogy was particularly important, as individuals needed to prove their ancestry in order to prove their eligibility for certain rights and privileges.

Details from Paulys Realencyclopädie der classischen Altertumswissenschaft Family tree of Iulius Caesar

As society became more advanced, the practice of recording family histories evolved. In medieval Europe, family trees became a common way to visualize and understand family lineages. Families would often maintain elaborate documents and scrolls that recorded their family history, including important events and achievements. These documents were often passed down through generations as family heirlooms.

In the 19th century, interest in genealogy research surged, particularly in the United States. The rapidly expanding country sparked a desire for many Americans to trace their ancestry and understand their origins. This interest was further fueled by the growing availability of census records, immigration records, and other public documents.

As technology progressed, family tree research became easier and more accessible. In the mid-20th century, the introduction of computers and digitization made it possible to compile vast amounts of genealogical data and create sophisticated family trees. Today, online databases and genealogy websites make it easier than ever to research and create family trees.

In addition to being an interesting historical practice, family trees have important personal and societal benefits. For families, family trees provide a way to connect with one's ancestors, understand one's heritage, and pass down important family stories and traditions to future generations. They also provide a sense of identity and belonging, allowing individuals to understand their place in the context of their family and lineage.

On a larger scale, family trees can also have important social and cultural relevance. They can help societies better understand their history and evolution, as well as the social and political forces that have shaped their development. Family trees also provide a way to understand the broader human experience, connecting individuals to the collective history of humanity and highlighting the interconnectedness of cultures.

To learn which are the best DNA test sites available in the UK click here.

To learn which is the best software for doing a family tree click here.

To learn how to film your grandparent with a smartphone click here.

To learn how to trace holocaust survivors and victims in your family history click here.

To learn whether we should record the lives of our pets click here.

To learn how to research gay family history click here.


From Stonewall to Today: Examining LGBTQIA+ Family History and Its Significance in the Present

From Stonewall to Today: Examining LGBTQIA+ Family History and Its Significance in the Present

The month of June holds a significant place in the history of the LGBTQIA+ community. It was just over 52 years ago, on a hot New York night in 1969, when patrons of the Stonewall Inn fought back against police brutality and discrimination, sparking a movement towards equality and acceptance. Today, the fight for LGBTQIA+ rights continues, and one of the ways to honor and celebrate the history and lives of the community is to explore and document LGBTQIA+ family history.

LGBTQIA+ family history is a crucial component of the community’s identity and heritage. Over the years, many people have feared to come out to their families due to stigma, discrimination, and violence. But for those who have overcome these obstacles and gone on to build families of their own, documenting their family history has become an essential way to ensure that their stories are remembered and passed down to future generations.

One of the primary challenges facing those who want to explore LGBTQIA+ family history is the lack of resources. Due to discrimination and marginalization, many of these families’ stories were recorded informally or not at all. Additionally, family members of LGBTQIA+ people have sometimes intentionally removed or hidden records and photographs. Despite these obstacles, there has been increased interest in recent years in documenting these histories, and individuals have found unique ways to locate and preserve them.

One of the most significant sources of LGBTQIA+ family history is oral history. Recording interviews with family members and friends, especially older generations, can often yield information that otherwise might have been forgotten. These interviews can offer a glimpse into the lives of LGBTQIA+ ancestors, their relationships, and their experiences.

Another way to find LGBTQIA+ family history is through the archives. Community organizations, libraries, and museums have started to collect documentation relevant to LGBTQIA+ history, including family materials. These archives offer a wealth of material for family historians who want to understand the context and culture of LGBTQIA+ family life.

Documenting LGBTQIA+ family history is crucial to ensure future generations are aware of their heritage and instill pride in their identities. By understanding their family's resilience, the sacrifices made by earlier generations, and how far they've come, people gain a deeper understanding and appreciation of their families and their place within the LGBTQIA+ community.

Through family history, we can also challenge historical narratives that ignore or exclude marginalized communities and promote a greater understanding of LGBTQIA+ history, struggles, and achievements. This plays a critical role in encouraging social change and acceptance, as it helps people develop empathy and a better appreciation for the community.

Preserving the LGBTQIA+ family history has the potential to increase awareness of the community's experiences, build stronger connections, challenge the dominant narrative, and promote understanding and support for the LGBTQIA+ community. These outcomes are particularly valuable in areas where stigma and discrimination against the community still exist.

Ultimately, LGBTQIA+ family history offers a powerful tool for promoting social change, recognizing overlooked experiences, and fostering empathy and understanding. Encouraging individuals and families to document their history serves the dual purpose of preserving a vital heritage and providing a critical contribution to the ongoing struggle for LGBTQIA+ rights and recognition.

Preserving LGBTQIA+ family history ensures that future generations have access to a diverse and prosperous legacy that can instill a sense of pride and acceptance in individuals. In doing so, it encourages individuals to remain true to themselves and confident about their ancestral history.

Silver Screen Family offers a valuable service by helping individuals document their personal history through video recordings. This not only ensures that the stories of their loved ones are preserved for future generations but also educates and informs audiences who may not have been familiar with these stories before.

During my conversation with Kevin, he shared his journey towards self-discovery, his relationships with friends and family, and how he became a stage director for Europride '92. Through our discussions, it became evident that family history can serve as a powerful tool that inspires people to connect with their roots and nurture a deeper understanding of their family's contributions to the LGBTQIA+ community.

In summary, LGBTQIA+ family history is essential for promoting social change and acceptance. By recognizing and sharing the experiences and struggles of the community, we can better understand and appreciate the diversity and resilience of this community. Companies like Silver Screen Family play a vital role in documenting and preserving this history, ensuring that it is remembered and celebrated for generations to come.

If you would like us to make a film about a loved one get in touch today!

Where did people get displaced to after the Spanish Civil War.


The Spanish Civil War, which lasted from 1936 until 1939, was a civil war in Spain; the civil war was primarily fought between Republicans of the Second Spanish Republic and Nationalists. The Spanish Civil War was eventually won by the Nationalists who ruled Spain from 1939 until 1975 when Francisco Franco, one of the leading Nationalist generals during the war, died. The exact casualties of the Spanish Civil War are unknown; estimates range from at least 200,000 to over a million.  

If your family history is related to the Spanish Civil War, then you may discover that relatives on your family tree were among those displaced by the war. The following guide will help you learn more about forgotten family memories by discussing where people were displaced after the Spanish Civil War.  

Spanish Civil War: What Happened to the People

At least several million people from Spain were displaced due to the Spanish Civil War. In many cases, the people were fleeing violence from encroaching armies; they also fled due to existing political affiliations that made it dangerous for them to remain in Spain.

Where People Went After the Spanish Civil War

People who were displaced due to the war—whether they were refugees whose homes were destroyed or they were fleeing for their lives—primarily went to the few locations that would accept them. There were only a handful of countries that opened their borders to Spanish refugees.

Mexico

Mexico was one of the few countries that welcomed Spanish refugees. Although it was difficult for many fleeing Spain to get to Mexico due to the distance and difficulty of getting from Europe to the North American continent, around 25,000 Spanish refugees made it to Mexico for safety. Many of those who fled to Mexico had family or friend connections, which made it easier for them to make the journey. 

Dominican Republic

Although the Dominican Republic was a supporter of the new Nationalist regime in Spain, the President of the Dominican Republic at the time allowed those fleeing Spain to seek refuge. A few thousand people who fled Spain ended up moving to the Dominican Republic. 

France

France was the primary destination for those who were fleeing Spain after Spanish Civil War. Around 500,000 Spanish Republicans fled into France during and after the war. Because they were not legally allowed in the country, most of these refugees were forced into internment camps. When the Nazis occupied France in 1940, they forcibly conscripted many of these interned refugees for forced labor. Around 30,000 Spanish refugees were deported to Nazi Germany, and around half of this group was imprisoned in concentration camps. At least 3,500 Spanish refugees died in concentration camps during the war. 

The Spanish Civil War not only caused physical displacement but also shattered families, with many loved ones separated or killed in the conflict. The war left a deep scar on Spain, and its effects continue to be felt even today.

For many families, preserving their history and heritage is of utmost importance. Family history can help people to learn about their ancestors and understand the events that shaped their lives. This is particularly true for those who were affected by the Spanish Civil War, as the conflict had a profound impact on their lives, even generations later. Preserving family history allows people to remember the struggles of their forebears and to honor their courage and resilience.

One of the most important ways to preserve family history is by collecting oral histories from surviving family members. These stories can provide valuable insights into the experiences of those who lived through the Spanish Civil War and the aftermath of displacement. Many families also have photographs, letters, and other mementos that provide a tangible link to their heritage. All these elements taken together can help to create a vivid picture of what life was like for those affected by the war.

The importance of family history is not just limited to individual families; it has broader cultural significance as well. Knowing about the experiences of displaced people during the Spanish Civil War can help us to better understand the broader context of the conflict. By understanding the experiences of refugees, we can gain insight into the human cost of war and the need for reconciliation.

In conclusion, the Spanish Civil War was a tragic conflict that devastated countless lives. The displacement of families and communities is one of the many legacies of this tragedy. Preserving family history is an important way to honor the experiences of those who lived through this difficult period and to pass on this knowledge to future generations. By preserving family history, we honor our past and gain a deeper understanding of who we are.

To learn how to label your old photo digital scans by using metadata click here.

To learn how to back up your old photos click here.

To learn how to convert old family slides click here.

Transfering your old VHS to DVD and then uploading them to the cloud.

What is the best software to burn my family VHS videos to DVD?

Are you worried about your family history being lost due to outdated formats like VHS? If so, you are not alone: now that VHS players are no longer being produced, you are right to worry because once your VHS players stop working it means that you can no longer enjoy your family movies.

And what will happen with the next generation, who aren’t going to have old VHS players in the garage?

Sharing family films with your children, especially films which feature family members who have passed away will be nearly impossible if you leave them on VHS. Thankfully, you don’t have to leave your family movies on VHS to rot away. Transferring them to DVD is the first step to preserving them for future generations and making them accessible to watch for other people in your family who want to enjoy family history. To do this, you will need the right software and tools.

Let’s take a closer look at the best software you can use to transfer your family movies from VHS to DVD.


Roxio Easy VHS to DVD 3 Plus

This is the most accessible software that anyone with access to a computer should be able to use. With the Roxio software, you will be able to connect your VHS player or camcorder right to your computer using a USB device. From there, all you have to do is use the installed Roxio software to capture the movies, transfer them and then burn them onto a DVD or even convert them into files you can store on your phone, the digital cloud, Facebook or YouTube. Best of all, the Roxio software isn’t just a convertor: you can actually stabilize shaky old home videos, trim them if you want, or split them into different DVDs by theme, year, and people who are in the film, and so on. For example, you could create a DVD solely of children’s Christmas concerts, family birthday videos, and so on.


Golden Videos VHS to DVD Converter

Like Roxio, this is fairly accessible software that allows you to easily convert family movies on VHS to DVD. This software works similarly to the Roxio software. You connect your VHS player to your computer, use the software to capture and transfer the footage, and from there you can burn it onto DVD or convert it into a file that can be shared online or stored in the cloud. There are some more complex video editor tools with this software, such as automatic stabilization and the ability to add subtitles and even special effects. If you are looking to do more than simply capture the videos as-is, then this is a good software option that will let you play around with your family videos in a more complex way.


Remember: VHS tapes do not last forever. If you are worried about sharing home movies with your children and grandchildren and others in your family, then make sure you back them up to DVD so they can be cherished forever.

Uploading DVDs to the cloud.

Now that you have digitized your VHSs into DVDs, you already know how fun it is to pop in a DVD and relive your family history at the push of a button. But did you know that DVDs are actually quite limiting when it comes to sharing and preserving family movies? Let’s take a closer look at the limitations of family films on DVD and how you can transfer the DVDs of your family movies onto the cloud to the benefit of your entire family—and to the benefit of preserving your family history.

Limitations of Using DVDs for Family Videos

DVDs are a step up from VHS, which is now an outdated method of film preservation. However, there are still some limitations to having family movies on DVDs. The two most significant limitations are as follows. One, the fact that DVDs do not last forever: They can be lost, scratched, and eventually will not work due to the natural degradation of the DVD material. The second limitation is that you can’t easily share DVDs with other people in your family, which makes sharing family movies more difficult than it has to be; for instance, if you want to share your childhood home movies with your sister who lives across the country, there’s no easy way to make a copy of the DVD for her.

The solution to this problem is simple: transfer DVDs to the digital cloud. This way, family history, and family films can be shared using an easy digital file that can be sent to whomever you would like. The file will also be backed up on the cloud so that if something ever happens to the DVD, you have a copy and your family history isn’t lost.

How to Transfer DVDs onto the Digital Cloud

Now that you know that you want to transfer your family movies DVDs onto the cloud, all you need to do is follow the step by step guide that will teach you how to back up your DVDs on the cloud for easy sharing and storage.

Step One: Transfer the DVDs to a computer

You will first need to transfer the DVD files onto a computer. This will almost always require using a software program, since most DVDs are encoded and it’s not as simple as dragging a file onto your laptop or computer desktop.

Step Two: Check the format

Once you have the DVD video files onto your computer, you will need to make sure they are in an accessible format. The most accessible format today is “.mp4,” so this is the format you should aim for, as it can be viewed on almost all smart phones, laptops, computers and tablets. If you are using a software program, it will give you the option to choose the format.

Step Three: Upload to your preferred cloud—and share!

Next, upload it to your preferred cloud service such as Google Drive. Then share with friends and family and enjoy the fact that your family history is now accessible and preserved.

Should you store your files on YouTube?


It’s becoming easier than ever to backup family mementos in ways that allow you to share them with the rest of your family—but what about family movies? Unlike family photos, movies aren’t as easily uploaded to sites where your family can privately access them to view family history. One option that many people are turning to in order to store family films is YouTube. But should you store your family history on YouTube? Let’s take a closer look at the options you have for storing family movies using this service. 

Uploading to YouTube 

There are three primary ways that you can upload family films to YouTube: public videos, private videos and unlisted videos. Each of these video options has its pros and cons when it comes to uploading family movies.  

Public Videos 

Public videos are completely available to the public. Anyone can technically find your family movies if they happen to come across them using the search function. This also means that the videos can be shared and embedded by anyone on the internet. It is not the best option if you want your family movies to be private, or if the information or content on the videos is something you (or someone in the video) wouldn’t want to be shared with the world. This option does allow for easier access for family members because they won’t have to follow special links or get invited, but it does come with the drawbacks of no privacy. 

Private Videos 

Private videos can only be viewed by people who have been specifically invited to view the video. This means that anyone who wants to view the video has to have a YouTube account, and you (or whoever decides to upload the videos) have to invite them. This is the ultimate private option on YouTube, as it allows you to grant exclusive control over who can view the video. This option is limited to 50 accounts, so it’s not ideal if you want to share the video with a massive amount of family members. 

Unlisted Videos 

Unlisted videos can technically be viewed by anyone—however; they cannot be found using the search function and can only be discovered by people who have the specific link to the video. You can then give out this link to a select group of people whom you want to see your family movies. The upside to this option is that people can view it without having a YouTube account or waiting to be invited/approved; the downside is that the videos are technically not private and if someone gives out the link in a public location, other people could view the video. 

If you want to store your family movies on YouTube, carefully consider the above options when making your decision. 

To learn how to film your grandparent with a smart phone click here.

To learn how to back up your old photos click here.

To learn how to convert old family slides click here.

To learn how to Label Your old photo digital scans by using metadata click here.

At Silver Screen Family, our mission is to help families create beautiful films that capture the stories and experiences of their elders, ensuring that they are remembered and cherished for generations to come.

First and foremost, creating a film about your elders is a wonderful opportunity to preserve their legacy. Our parents and grandparents have lived through times and events that we may not have experienced ourselves. By documenting their stories and experiences, we can ensure that their legacy is passed down accurately and authentically. Moreover, these stories can help us to understand the world from their perspective, which can be incredibly enlightening and valuable.

Secondly, creating an heirloom-quality film is a perfect way to honor and show gratitude to your elders. Our elders are often the ones who have laid the foundation for our lives and our society. By creating a beautiful and heartwarming film about their life, you are showing them that their hard work and dedication have not gone unappreciated.

At Silver Screen Family, we work with you to create a unique and personalized film that captures every aspect of your elders' lives. Our experienced team combines visual elements with insightful interviews to create a beautiful and compelling film that you and your family will want to return to for years to come.

In conclusion, a well-made film about your elders is an invaluable investment for your family. It allows you to preserve their legacy and honour their contributions, offer them therapeutic benefits, and create a treasured heirloom that can be passed down through future generations. We at Silver Screen Family are committed to providing you with a personalized and high-quality service, and we would be honoured to help you create a beautiful film about your elders.

Thank you for considering our services.

Alzheimer's - Should we record our loved one before the late stages of the illness begins?

Preserving Memories: Capturing the Essence of Loved Ones Before Advanced Alzheimer's

Alzheimer's disease is a devastating condition that gradually robs individuals of their memories and cognitive abilities. In the face of this challenging illness, a crucial question emerges: Should we record our loved ones before the late stages of Alzheimer's begin? In this blog post, we will delve into the significance of early recording, explore the benefits it brings to both individuals with Alzheimer's and their families, and discuss practical ways to capture and preserve precious memories.

Preserving Memories, Preserving Identity: Memories shape our identities and connect us to our past. For individuals living with Alzheimer's, memory loss is an inevitable part of their journey. Recording our loved ones' stories and experiences in the early stages of the disease allows us to help preserve their memories and maintain a sense of identity. It provides them with a tangible link to their past and serves as a reminder of the rich life they have lived.

Seizing the Opportunity: Waiting until the late stages of Alzheimer's to record our loved ones means potentially losing the chance to capture their memories forever. The early stages of the disease, when cognitive decline is mild, offer a critical window of opportunity. During this period, individuals can actively participate in the recording process, share their unique perspectives, and contribute to the preservation of their own legacy. It is a time when their memories are still relatively accessible, making it an ideal moment to capture their stories.

Fostering Connection and Understanding: Engaging in the recording process allows for emotional connection and understanding between individuals with Alzheimer's and their loved ones. Memories are often intertwined with emotions, and hearing their stories can evoke shared laughter, tears, and moments of profound connection. By actively participating in the recording, individuals with Alzheimer's can feel valued, heard, and understood, fostering a deeper bond with their families and providing an opportunity for meaningful interactions.

Preserving Family Stories: A Step-by-Step Guide to Privately Sharing Family Videos on Vimeo


Preserving Family Stories: A Step-by-Step Guide to Privately Sharing Family Videos on Vimeo

Vimeo, a popular video-sharing platform known for its high-quality video playback, offers robust privacy features that allow you to securely share family videos with your chosen audience. With its user-friendly interface and focus on creative content, Vimeo provides an excellent platform for preserving and sharing your cherished family memories. In this blog post, we will guide you through a step-by-step process on how to upload and privately share your family videos on Vimeo, ensuring the confidentiality and accessibility of your personal moments.

1) Sign in to Your Vimeo Account:

Visit vimeo.com and sign in to your Vimeo account using your credentials. If you don't have an account, create one by following the prompts provided.

2) Access the "Upload" Page:

Once signed in, click on the "Upload" button located in the top-right corner of the Vimeo homepage. This will take you to the upload page.

3) Upload Your Family Video:

On the upload page, click on the "+ Choose videos to upload" button or drag and drop your family video file into the designated area. Wait for the upload to complete.

4) Customize Privacy Settings:

After the video has finished uploading, you will be directed to the video settings page. Under the "Privacy" section, select the "Only people with a password" option. This setting ensures that only individuals with the password can access the video.

5) Set a Password:

Enter a strong and unique password in the "Password" field. Make sure to choose a password that is easy to remember for those you want to share the video with, while keeping it secure from unauthorized access.

6) Enable Domain-level Privacy (Optional):

If you want to further restrict access to your family video, you can enable domain-level privacy. This feature allows you to specify which domain(s) the video can be embedded on or viewed from. You can add your personal website domain or any trusted domains associated with your family members.

7) Save the Privacy Settings:

Once you have customized the privacy settings and, if necessary, enabled domain-level privacy, click on the "Save" or "Publish" button to apply the changes.

8) Share the Video and Password:

After saving the settings, you will be provided with a unique video URL. Copy the URL and securely share it with the intended viewers along with the password. You can send it via email, direct message, or any other secure communication method.

9) Notify Viewers:

Send a separate message or email to the intended viewers, informing them about the video and providing the URL and password. Encourage them to keep the password confidential and respect the privacy of the video.

Vimeo offers a secure and customizable platform for privately sharing your family videos. By following this step-by-step guide, you can upload your videos, customize privacy settings, and share them with your chosen audience using a password-protected access. Preserve your family's memories, maintain control over your videos, and ensure the confidentiality of your personal moments by leveraging the features of Vimeo.

For more valuable insights and guidance on recording your family history, we invite you to visit our "Lights Camera Ancestry" video series. Through our videos on the SSFDocumentary YouTube channel, Silver Screen Family provides a wealth of information covering genealogical topics and expert tips on how to record and preserve your family's history.

Don't miss out on the opportunity to create a lasting legacy for your loved ones. Join us on Silver Screen Family's YouTube channel and embark on an exciting journey of capturing and sharing your family's remarkable stories. Together, let's celebrate the power of family and the enduring value of preserving our shared history.


Securing Family Memories: A Step-by-Step Guide to Privately Sharing Family Videos on Google Drive


Securing Family Memories: A Step-by-Step Guide to Privately Sharing Family Videos on Google Drive

Google Drive provides a reliable and secure platform for storing and sharing files, including family videos. With its robust privacy features and user-friendly interface, Google Drive allows you to maintain control over who can access and view your precious family memories. In this blog post, we will walk you through a step-by-step guide on how to upload and privately share your family videos on Google Drive, ensuring their safety and privacy.

1) Sign in to Your Google Account:

Visit drive.google.com and sign in to your Google account using your credentials. If you don't have an account, create one by following the prompts provided.

2) Access Google Drive:

After signing in, you will be redirected to the Google Drive dashboard. If not, click on the "Drive" icon or the "Go to Google Drive" button to access your Drive.

3) Create a Folder for Family Videos:

Click on the "+ New" button on the left-hand side of the screen and select "Folder" from the dropdown menu. Give the folder a name that reflects its contents, such as "Family Videos."

4) Upload Your Family Video:

Within the newly created folder, click on the "+ New" button again, but this time select "File upload" from the dropdown menu. Choose the family video file from your device's storage and wait for the upload to complete.

5) Customize Sharing Settings:

Once the video is uploaded, right-click on it and select "Share" from the context menu. In the sharing settings window, click on "Change" next to the people's names or email addresses with whom the video will be shared.

6) Set Sharing to "Specific People":

In the sharing settings, select the option "Specific people" to restrict access to the video. Enter the email addresses or names of the individuals you want to grant access to. You can also choose their level of access, such as "Viewer" to allow them to watch the video without editing privileges.

7) Notify Viewers:

After customizing the sharing settings, you can notify the intended viewers about the video. Send them an email or message, providing a direct link to the video in Google Drive. They will need to sign in to their Google account to access it.

8) Add Descriptions and Organize:

To provide additional context, add descriptions or tags to the video file within Google Drive. You can do this by right-clicking on the video, selecting "More options," and choosing "Manage versions." Add any necessary information or details to enhance the viewing experience for your selected audience.

Google Drive offers a secure and versatile platform for privately sharing your family videos. By following this step-by-step guide, you can upload your videos, customize sharing settings, and select specific individuals with whom you want to share your precious memories. Safeguard your family's legacy, maintain control over your files, and ensure the privacy of your family videos by leveraging the power of Google Drive.

For more valuable insights and guidance on recording your family history, we invite you to visit our "Lights Camera Ancestry" video series. Through our videos on the SSFDocumentary YouTube channel, Silver Screen Family provides a wealth of information covering genealogical topics and expert tips on how to record and preserve your family's history.

Don't miss out on the opportunity to create a lasting legacy for your loved ones. Join us on Silver Screen Family's YouTube channel and embark on an exciting journey of capturing and sharing your family's remarkable stories. Together, let's celebrate the power of family and the enduring value of preserving our shared history.

Safeguarding Memories: A Step-by-Step Guide to Privately Sharing Family Videos on Facebook

Safeguarding Memories: A Step-by-Step Guide to Privately Sharing Family Videos on Facebook

Safeguarding Memories: A Step-by-Step Guide to Privately Sharing Family Videos on Facebook

Facebook, a widely-used social media platform, offers various privacy settings that allow you to share family videos exclusively with your chosen audience. With its user-friendly interface and extensive reach, Facebook provides a convenient way to connect with family members and share cherished memories. In this blog post, we will provide a step-by-step guide on how to upload and privately share your family videos on Facebook, ensuring the security and privacy of your personal moments.

1) Sign in to Your Facebook Account:

Visit facebook.com and sign in to your Facebook account using your credentials. If you don't have an account, create one by following the prompts provided.

2) Navigate to Your Facebook Profile:

Once signed in, click on your name or profile picture in the top-right corner of the Facebook page. This will take you to your Facebook profile.

3) Access the "Photos" Section:

On your profile, locate the "Photos" tab and click on it. This will bring you to the photos section of your Facebook profile.

4) Create a New Album:

Within the photos section, click on the "Create Album" button. Give your album a name that is relevant to the family videos you will be uploading. You can also add a description or location if desired.

5) Upload Your Family Video:

Within the newly created album, click on the "Add Photos/Video" button. Select the family video file from your device's storage and follow the on-screen instructions to upload it to Facebook. Ensure that you respect any copyright laws or restrictions that may apply to the content you are uploading.

6) Customize Privacy Settings:

After the video finishes uploading, click on the album to open it. In the top-right corner, click on the three-dot menu and select "Edit Album" from the dropdown menu. A window will appear, allowing you to customize the album's privacy settings.

7) Set Album Privacy to "Only Me" or "Specific Friends":

In the privacy settings window, choose between "Only Me" or "Specific Friends" to control who can view the album and its contents. If you select "Specific Friends," you can choose individual friends or create a custom friends list. This ensures that only the intended audience can access the videos.

8) Share the Album with Selected Individuals:

To share the album with specific individuals, return to the album view and click on the three-dot menu in the top-right corner. Select "Edit Audience" from the dropdown menu. Enter the names or select the desired friends to grant them access to the album.

9) Add Descriptions and Tags (Optional):

While in the album view, you can add descriptions or tags to the videos to provide context or identify individuals in the footage. This step is optional but can enhance the viewing experience for your selected audience.

10) Notify Viewers:

Once you have customized the privacy settings and added any necessary descriptions or tags, you can notify your selected viewers about the album. You can either send them direct messages or mention them in a post, providing a link to the album.

Facebook offers a simple and effective platform for privately sharing your family videos. By following this step-by-step guide, you can upload your videos, customize the privacy settings, and select specific friends or create custom friends lists to share your cherished memories with. Safeguard your family's legacy, foster connections, and celebrate special moments by securely sharing family videos on Facebook.

For more valuable insights and guidance on recording your family history, we invite you to visit our "Lights Camera Ancestry" video series. Through our videos on the SSFDocumentary YouTube channel, Silver Screen Family provides a wealth of information covering genealogical topics and expert tips on how to record and preserve your family's history.

Don't miss out on the opportunity to create a lasting legacy for your loved ones. Join us on Silver Screen Family's YouTube channel and embark on an exciting journey of capturing and sharing your family's remarkable stories. Together, let's celebrate the power of family and the enduring value of preserving our shared history.

Sharing Memories Safely: A Step-by-Step Guide to Privately Uploading and Sharing Family Videos on YouTube

Sharing Memories Safely: A Step-by-Step Guide to Privately Uploading and Sharing Family Videos on YouTube

Preserving and sharing family videos is a wonderful way to relive cherished memories with your loved ones. YouTube, one of the most popular video-sharing platforms, offers a private sharing feature that allows you to share videos exclusively with selected individuals. In this blog post, we will guide you through the step-by-step process of uploading and privately sharing your family videos on YouTube, ensuring that your memories remain secure and accessible only to those you choose.

1) Create a YouTube Account:

If you don't already have one, create a YouTube account by visiting youtube.com and clicking on "Sign In" in the upper-right corner. Follow the prompts to create your account using your Google credentials or by signing up for a new account.

2) Access YouTube Studio:

After signing in to your YouTube account, click on your profile icon in the upper-right corner and select "YouTube Studio" from the drop-down menu. This will take you to the YouTube Studio dashboard.

3) Upload Your Family Video:

In YouTube Studio, click on the "Create" button in the upper-right corner and select "Upload videos" from the drop-down menu. Choose the family video file from your device's storage and follow the on-screen instructions to upload it to YouTube. Ensure that you respect any copyright laws or restrictions that may apply to the content you are uploading.

4) Set Video Privacy to "Private":

Once the video has finished uploading, click on the video thumbnail to access its settings. Under the "Visibility" section, click on the drop-down menu and select "Private." This setting ensures that only people you explicitly invite will be able to view the video.

5) Invite Viewers:

To invite specific individuals to view the video, click on the "Share" tab located below the video player. In the "Share privately" section, enter the email addresses or YouTube usernames of the people you want to invite. You can include multiple email addresses or YouTube usernames separated by commas.

6) Customize Viewing Permissions:

By default, invited viewers will have the ability to comment on the video. If you wish to disable comments or allow viewers to comment without displaying their comments publicly, you can customize these settings under the "Share privately" section. Choose the appropriate option that aligns with your preferences.

7) Send Invitations:

After customizing the viewing permissions, click on the "Send" button to send invitations to the selected individuals. They will receive an email notification with a link to view the video. If they have a YouTube account, they will be prompted to sign in before accessing the video.

8) Manage Access and Notifications:

To manage the access and notifications for the privately shared video, return to YouTube Studio and select the video. From there, you can add or remove viewers, modify their access permissions, and even revoke access if needed.

Sharing family videos privately on YouTube provides a secure and convenient way to relive and cherish your precious memories with your loved ones. By following this step-by-step guide, you can confidently upload your videos, set them to private, and invite specific viewers to enjoy and reminisce with you. Preserve your family legacy, foster connections, and create lasting bonds by safely sharing your treasured moments through the power of YouTube.

For more valuable insights and guidance on recording your family history, we invite you to visit our "Lights Camera Ancestry" video series. Through our videos on the SSFDocumentary YouTube channel, Silver Screen Family provides a wealth of information covering genealogical topics and expert tips on how to record and preserve your family's history.

Don't miss out on the opportunity to create a lasting legacy for your loved ones. Join us on Silver Screen Family's YouTube channel and embark on an exciting journey of capturing and sharing your family's remarkable stories. Together, let's celebrate the power of family and the enduring value of preserving our shared history.

Making a will? 5 things your lawyer won’t tell you.

Signing Will Silver Screen Family

Making a will? Here are 5 things your lawyer won’t tell you.

Wills are important if you want to make sure that your estate, personal belongings and anything else left behind is properly taken care of—and distributed—in regards to your family. After all, everything from lucrative estate holdings to precious family memories can be left behind when you pass, and you want to make sure that everything is in order. However, there are some things that lawyers won’t tell you when you’re making up a will. The following are 5 things you need to know about making a will if you want to make sure that your family history legacy and interests are properly represented.

You can’t—or shouldn’t—leave anything to “your family” 

Pen-writing-notes-studying.jpg

Yes, you can leave things to your family—but you should never literally leave anything (whether it’s the management of your estate or specific objects or houses or other financial holdings) to the descriptor “my family.” For instance, you should not have your will say that you “Leave the distribution of my savings to the discretion of my family,” or “I leave my house with my family to split up.” This vague description leads to massive legal problems because it does not designate a specific person. Anything that you are “leaving” to someone in your will needs to be clearly spelled out to a specific person. 

You don’t need a lawyer to draft the entire will

Lawyers don’t like to admit it, but you don’t actually need a lawyer to draft an entire will! If you have a vast estate or a lot of financials then you should consult a lawyer; but the average layperson can get away with carefully creating a will using a template and then having a lawyer look it over at the end. 

Last Will and Testament Silver Screen Family

The witnesses to your will need to meet a certain criteria

In most legal jurisdictions, your will needs to be signed by witnesses. These witnesses, however, do need to meet certain criteria in order to be considered valid. For instance, in most jurisdictions, a witness cannot inherit anything in your will.

Some countries might not accept your will if it’s handwritten.

Silver Screen family handwritten will

Although handwriting wills is common, many legal jurisdictions require that wills be typed in order to be considered valid in a court of law. The reasons for this are varied, but the short of it is that you need to have your will typed up and then signed by witnesses in order for it to be enforceable. 

Letters of instruction are helpful—but might not be legally enforceable

Letters of instruction are often created as a supplement to a will. They are designed to give more specific instructions about what you want done with certain things, and most people use them to designate who gets what in terms of household objects, personal items, and so on. However, you should note that letters of instruction may not be legally enforceable. So make sure that a lawyer helps you designate these instructions in your actual will, not just the supplement.


At Silver Screen Family, our mission is to help families create beautiful films that capture the stories and experiences of their elders, ensuring that they are remembered and cherished for generations to come.

First and foremost, creating a film about your elders is a wonderful opportunity to preserve their legacy. Our parents and grandparents have lived through times and events that we may not have experienced ourselves. By documenting their stories and experiences, we can ensure that their legacy is passed down accurately and authentically. Moreover, these stories can help us to understand the world from their perspective, which can be incredibly enlightening and valuable.

Secondly, creating an heirloom-quality film is a perfect way to honor and show gratitude to your elders. Our elders are often the ones who have laid the foundation for our lives and our society. By creating a beautiful and heartwarming film about their life, you are showing them that their hard work and dedication have not gone unappreciated.

At Silver Screen Family, we work with you to create a unique and personalized film that captures every aspect of your elders' lives. Our experienced team combines visual elements with insightful interviews to create a beautiful and compelling film that you and your family will want to return to for years to come.

In conclusion, a well-made film about your elders is an invaluable investment for your family. It allows you to preserve their legacy and honor their contributions, offer them therapeutic benefits, and create a treasured heirloom that can be passed down through future generations. We at Silver Screen Family are committed to providing you with a personalized and high-quality service, and we would be honored to help you create a beautiful film about your elders.

Thank you for considering our services.


How to Write a Genealogy Research Report

Silver Screen Family history

How to Write a Genealogy Research Report.


Family history is important—and far too often, family history is lost to time because people don’t take the crucial step of committing family history to paper. If you want to preserve family memories, find out more about your family tree and other important historical information, you should create a genealogy research report. The following is a step by step guide that will help you turn your family history into a genealogy report that will help you and future generations of your family remember the past.

Step One: Determine your research goals

First, you need to determine your research goals for your research report. Are you looking to fill out an entire family tree? Do you have an existing family tree that needs gaps filled in? Do you want to find out more about certain areas of the family? How far back do you want your research to go? Once you know the goals, it will be possible to move on to the next step of the report. 

To learn which is the best software for doing a family tree click here.

Step Two: Create an outline

Now you will need to create an outline for your report. Most reports should start with a basic introduction which leads into the various categories you want to cover in your report. You can finish your outline with a summary or conclusion based on your findings. Your outline can be as detailed or simplistic as you want it to be, based on your personal needs and how you prefer to work.

Whatever it is, the way you tell your story online can make all the difference.


Step Three: Research to fill in the outline

Once your outline is finished, you can begin researching to fill in the outline. The research should help you answer the questions created by the goals you set in the first step. If you can, organize your research by outline section; this will help you figure out what you need to write in each section later on, after all your research is done. 

To learn how to Label Your old photo digital scans by using metadata click here.

Step Four: Write the report

Once you have all of the research completed, it is time to get to the real heart of the work: actually writing the report. The key to a genealogy report is to be factual, concise, yet provide all of the relevant information at the same time. The length of your report will depend on what you wanted to cover and the amount of information you found during your research. 

Whatever it is, the way you tell your story online can make all the difference.

Step Five: Finalize 

When you have the first draft of your report written, have someone else check it over for you. They can check for spelling and grammar errors and give you their thoughts regarding the clarity and overall success of your report. If necessary, keep writing new drafts. Once you have a draft that you are happy with, it’s time to finalize everything. Your final report can be published wherever you wish, such as social media, an ancestry or genealogy site, or simply printed out and kept in your family’s important family history documents.

Keep the above steps in mind when writing a research report on your family genealogy. 

To find out why you should hire a genealogist click here.

To find out how to record your family’s love stories click here.

To learn how to back up our old photographs click here.

To learn how to share your old family films safely click here.


The Importance of recording your family’s love stories.

The Importance Of Recording Your Family’s Love Stories!

There is nothing nicer than listening to other couple’s love stories—but do you know your family’s love stories? Family memories about couples falling in love can be truly extraordinary, especially among family members who have been related for decades. Why not take the time to record your family’s love stories so that they can be passed down and shared with future generations? The following guide will help you learn how to turn family memories about love stories into recorded memories.

Silver Screen Family couple in a field

Do You Know Your Family’s Historical Love Stories?

First, how much do you really know about your family’s history in regards to love stories? Are there any special family memories you associate with love stories among your relatives, such as attending the wedding of an aunt and uncle who are truly in love or being there when your cousin proposed? Perhaps you’ve seen couples in old family photographs and wondered how they met. Whatever the case, you’ll want to read on to find out some great tips for preserving your family’s love stories by recording them for future generations.

Tips for Preserving Your Family’s Love Stories by Recording Them

The following are some great tips you can follow to preserve your family’s love stories by recording them on camera. 

Tip: Find out which family members have or know interesting family history “love stories”

XSilver Scree Family couple smiling

The first thing you should do in your quest to record family love stories is to find out who has the most interesting family history love stories to share. Grandparents? Parents? Cousins? Aunts? Uncles? Ask around to see who has been together the longest or who has the most interesting “first meeting” story. 

Tip: Ask family couples to come and record their story

You can also ask family couples to come and record their personal love stories. This is a great way to compile a lot of family history together since you will have the recorded stories of many different people in the family. You can go visit people in their homes and record them there, or ask them to come to your location in case you want a consistent background for the recorded stories. Remember to set up a tripod so that the camera doesn’t shake! 

Click here for tips on how to record a family interview with your smartphone.

Tip: Ask around for family members who can share older family love stories

couple married-Max-Quality.jpg

There may be people in your family who have passed away and can no longer share their love stories. But as anyone who has seen a loving couple in old family photographs and wanted to know more can attest, their stories are still well worth sharing and preserving. You should ask around to find family members who can share love stories from your family’s history, in particular stories about people who are no longer with us. 

Tip: Back up the recordings in multiple locations 

After you’ve recorded family members talking about family love stories, make sure that you back up the recordings in multiple locations. This should include backing up the files on a digital cloud, along with physical discs or USB sticks.

Check out our 10 questions to ask your parents before it's too late!

To learn which is the best software for doing a family tree click here.

To learn how to trace holocaust survivors and victims in your family history click here.

To learn whether we should record the lives of our pets click here.

To learn how to research gay family history click here.

New Year’s Resolutions - Remembering Family History

The new year is the perfect time to make resolutions! Among the traditional resolutions of getting healthier, trying something new and maybe saving up money for that big purchase you’ve always wanted—why not add some family history resolutions into the mix? Let’s take a closer look at why we make resolutions in the first place in addition to some ideas for family history resolutions you can make for 2021.

Why Make Resolutions?

Resolutions are a great way to set some yearly goals for you. These goals may be something you’ve wanted to do for ages but haven’t been able to commit to, such as losing weight or drinking more water. When it comes to making resolutions related to family history, you are making a resolution to embrace and preserve your family’s history for yourself, your current family, and future generations. After all, if no one knows who’s in old family photographs, how will your family memories get passed down the line?

New Year Family Resolution Ideas

With the reasons for making resolutions in mind, let’s take a closer look at some New Year’s family history related resolution ideas. These resolution ideas will help you get started when you make your 2021 resolution list.

Record your old family members

Far too often, family members pass away without ever having recorded their stories. You can help preserve your family memories by making a resolution to record your elderly family members. Make videos of them enjoying family parties; record them in interviews where you ask about their family, their past, and what history they know about. The more you record, the more can be passed down to children, grandchildren, and so on.

Check out our blog post on how to film your parents/grandparents with a smartphone here.

Check out our blogpost on 10 questions you should ask your parents before it is too late here.

Organize your family photo album

Silver Screen Family - photographs

Another resolution you can make is to take those old family photographs and finally organize them into a proper album! Too many people end up with stacks and boxes of photos that they “swear” they’ll organize one day, but they never do. You can change all that in 2021 by making a resolution to finally get those old family photographs together and organize them properly into a book.


Back up your old photos

Family photo albums are a window into your family history. The names, faces and stories of your family members are all held in your cherished photos and family films. Many people do not think about backing up their family photo albums and family films until something has happened to damage them, such as water or fire damage; thankfully, it is easier than ever to back up your old photos and keep your family history safe and secure. 

Check out our blog post on how to back up old photos here.


photo albums Silver Screen Family

Create a digital cloud for photo sharing

Modern photo sharing is easier than ever thanks to the cloud! If you want to share photos with family across the country or even across the world, all you need to do is upload family photos (and even videos) to a cloud that they can access. Not only will a cloud help other family members access precious family memories, but it acts as a back-up for those family photos and videos so that in case the originals get lost or damaged, you have a copy on hand. 

Check out our blog post on how to share family videos online privately here.


Create new family memories

Silver Screen Family - Family

Finally, you should resolve in 2021 to make new family memories! Family memories are something that you and your family will cherish for generations to come, whether they’re memories of making holiday cookies in the kitchen, watching a film together while snuggled on the couch, or hosting a snowball fight in the back yard.

Click here for some fun family history activities to do whilst in lockdown.

With the above resolutions in mind, your 2021 will be full of great family memories.

To learn which is the best software for doing a family tree click here.

To learn how to trace holocaust survivors and victims in your family history click here.

To learn whether we should record the lives of our pets click here.

To learn how to research gay family history click here.

How to Film your Parents/Grandparents on a Smart Phone or tablet

How to Film your Parents on a SmartPhone

Family history is not just a set of dates or a stack of posed photographs; it includes family memories, filmed or photographed or otherwise, that need to be preserved for future generations. If people don't share their knowledge of family history or their personal family memories, then that knowledge is lost forever. Thankfully, it is easier than ever to film family memories using a device that most people have in today's modern world: a smartphone. The following guide will help you learn how to properly film your parents or grandparents using your smartphone in order to learn more about family history and preserve it.

Step One: Prepare your smartphone

First, you will need to have a smartphone with a camera. Almost all modern smartphones have cameras. For best results, use a phone with a high-quality camera that has at least 10 MP. Don't forget that you will want to film horizontally!

Step Two: Arrange the lighting

Lighting can really make a difference in video quality. If you can, make sure to film during the mid-morning or late afternoon when there is softer natural light available. For best results, have the family member being interviewed sit facing a window, and film with your smartphone in between the family member and window.

Step Three: Make sure your sound will be clear

Sound will be key to preserving what your family member has to say, so take the time to make sure the sound quality will be excellent. For best results, purchase an inexpensive Lavalier microphone that is compatible with your smartphone. Also, make sure that all windows nearby are closed and that anything which creates ambient noise--such as fans, TVs, etc.--is turned off. 

Step Four: Find a way to keep the camera steady

It will be nearly impossible to keep the phone steady during filming, so you will need to find something to keep your phone in a stable position. A tripod stand, phone stand, or even a stack of books will help keep your phone steady.

Step Five: Set the "stage" to look nice

You will likely be sharing this video with family members or preserving it for future generations, to you'll want the "stage" or area where the family member is being filmed to look nice. Choose a clutter-free area of the home to film and make sure the area is clean and tidy to avoid distractions from mess, dirt, or clutter. 

Step Six: Frame your shot well

The final step is to make sure that your shot is well-framed. Have the family member being interviewed sit in a comfortable chair and position your smartphone so that they take up about 1/3 of the screen, as this will put them in focus while maintaining an aesthetically pleasing ratio. Remember before you start filming to ask the person being interviewed to leave a pause between your question and their answer, in case you need to edit.

With the above guidelines in mind, filming your parents or grandparents using your smartphone will be much easier!

If you prefer we could make an affordable and professional documentary, about you or your family. Get in touch today!

At Silver Screen Family we make films of your elders so that they can be remembered forever! Imagine if you could hear your grandfather laugh in 40 years’ time. To listen to him talk about how he met your grandmother? About what his schooldays were like? Who his best friend was? Giving your children advice?

We make affordable family documentaries so families’ can remember their loved ones forever.

To find out more click here!


Tips on how to identify unknown members in old family photographs.

Women_in_bathing_suits_on_Collaroy_Beach,_1908,_photographed_by_Colin_Caird.jpg

Tips on how to identify unknown members in old family photographs.


If you have ever flipped through albums of family photographs, then you’ve likely come across a dilemma many people face: unknown people in family photos. Uncovering the identity of people in unlabeled or only partially labeled photographs isn’t easy, but it’s important if you want to explore and record your family history. The following are some essential tips on how to identify unknown members in family photographs. 

Tip: Date the photograph through fashion/style

If the photograph isn’t dated, then you can attempt to date it by examining the fashion or overall style people are wearing in the photograph. Although this won’t give you an exact date, it can help give you a general time period for the photo—such as the 1920s, the 1950s, the 1980s and so on.  

Copy of Fashion collage 169-Max-Quality.jpeg

Tip: Post the photo on Facebook to share it with the family

If you have plenty of family members on Facebook or other social media, then it can help to post the photograph there and ask people if anyone knows the identity of the person in the photograph. This is especially helpful if you have older or more distant relations on Facebook, as they may have people in their family who will recognize the person in the photo.

pexels-tracy-le-blanc-607812.jpeg

Tip: Have a “family photographs identification” get-together

Having a get-together with your family to try to identify unlabeled family photos is a great way to explore family memories and secure more family history in one fell swoop. You can ask family members to bring at least a few photos of people who aren’t labeled and the photos will be passed around during the event; if anyone knows who is in the photo, they can share that information. 


Check out our fun family history activities to do at family reunions.


Tip: Research photos with specific locations 

If the photo was taken in a specific location, such as in front of a building or in a national park, museum, or other identifiable location, then you can research that location to find out more information. This information can help you date the photograph—for instance, if a building was torn down in 1958 and the fashion in the photograph is from the 1950s, then you can reasonably assume that the photograph was taken sometime between 1950 and 1958. If you aren’t sure of the location, finding out where the photo was taken may also help you on your way to identifying the person in the photo. 


Locations.jpeg

Tip: Look through family albums to see if any names are labeled on the back of the photos.

lossy-page1-1704px-Trouville_Aqua_Photo_verso.tif.jpg

In some cases, one photo of a family member may be unlabeled while other photos have more helpful information. Make sure you look through other family albums to see if there are any photos of the same person with a name, date, or other important information. 

Identifying people from your family photographs may not be an easy task, but it is a worthwhile one that will help you explore your family history. The above tips will help you on your journey to finally identify people in old family photos. 

Once you identify them add the gathered information to the metadata in your digital photos.

To learn how to label your old photo digital scans by using metadata click here.

To learn how to back up your old photos click here.

To learn how to convert old family slides click here.

How to share family photos online privately.

Silver Screen Family history photos

How to share family photos online privately.


Your family history is something that deserves to be passed down and preserved for future generations. Most people, unfortunately, are left with missing pieces of family history because they don’t take the time to preserve like not knowing who the person in an old photograph is; but it is easier than ever to create family history photo galleries to showcase and highlight your family, including tidbits about your family history that can be shared across generations. 


One of the great things about modern-day technology is that it allows people more access to recording equipment than ever before. If you want to create your own special family history photos, you no longer need to take old negatives to get processed. All you need is to scan your photos.

Ve_Day_in_London,_8_May_1945_HU49414.jpg

You can even share your family history photos online with the rest of your family, so you won’t have to try to figure out how to burn discs or send memory drives to people across the country. If you want to share your family history privately online, consider the following options to help you share family movies online while still keeping them private. 

Facebook 
Facebook is one of the most popular options to share your family photos with family privately. You can share family history with your family by uploading your family photos to your account under a custom filter that only allows certain people to view the post. This option will require you to have anyone who wants to see the photos on your Facebook account, so keep that in mind.  

Private Facebook Groups

You can create a private Facebook group for your family so that family history information can be shared and accessed right on Facebook. The benefits of a private group are that only people who have access to the group will be able to see the information, post comments, etc., so you can limit this to family members or other exclusive groups. Another benefit of this option is that it’s likely that most of your family members have a Facebook account, so this is a very accessible social media site. Finally, the Facebook platform is ideal for sharing all types of files and documents—including photos, videos, and even scanned letters—so this is a one-size-fits-all option in terms of what you can share.

Instagram and Twitter 

Instagram and Twitter are both potential social media options that you should consider. Both of these social media platforms have options for private posting, but you cannot limit the content to specific groups. For instance, if you post something on your friends-only Twitter account, all of your Twitter friends—not just family members—will be able to see it. This option is best if you are going to post content that is not sensitive or private, such as your own personal family history photos that you don’t mind sharing with others; conversely, it’s not the best option for sharing personal or private information, particularly if it relates to other family members. 

Google Drive  

Another option for privately uploading family photos is using Google Drive. Google Drive can be used to upload content and then create private links, so that only anyone with the link can view the photos. You can also password protect your photos for added security, but remember that you’ll need to give the password to any family members who want to view the galleries.  


Other Options

There are a few other options you may want to consider if the above two choices don’t work for your needs. There are other family history related websites, such as ancestry sites, where you can share and upload family history information; and you can also consider creating an online group on a messaging platform such as Skype or LINE, where you can chat with individuals or groups and share photos, links, and so on.

Whichever platform you choose, just remember to enjoy sharing your family history through family movies in a private space online. 

To learn how to back up your old photos click here.

To learn how to convert old family slides click here.

To learn how to Label Your old photo digital scans by using metadata click here.


The importance of taking photos of family member's graves.

The importance of taking photos of family member's graves.


Family photographs are an integral part of our family history and even our family memories—but some people may shy away from taking family photographs of a more somber nature, such as photos of death stones. Should you take photos of your family’s death stones? The following are some of the key reasons why you should start taking photos of family death stones to preserve for future generations. 

Death stones are an important part of family history

Family history isn’t just about weddings or births or photos of family homes—death is just as much an important part of family history as people’s lives. Death stones provide key information regarding the year and usually the day and month that people died, along with their birth date; death stones can also provide information regarding where people died or where family plots are located. And in some cases, depending on the style of the stone itself, they can provide an interesting insight into family history. For instance, some death stones may contain quotes, poetry, or imagery that were important or relevant to a person in their life. 

Death stones may get moved or damaged and then be lost forever

Unfortunately, death stones can sometimes become damaged or moved over time. In some cases, death stones can get damaged during storms or due to the degradation of materials. And in other cases, stones are moved due to new developments on the land. This may not happen during your lifetime, but who knows what can happen a few decades down the line. If something does happen to the stone, your family will have a record of the death stone (along with its important family history related information) thanks to the preserved photographs. Make sure to always create back-ups of your family photographs as well.

Photographs of death stones can help with family research 

Death stones can help you or other members of your family if you are delving into family history research. Since death stones can provide a wealth of history related information, they can help people find out more about various family members. In fact, information provided by a death stone could be a useful “springboard” to finding more records and information about people in your family. 

They are a unique element of family history that future generations will be interested in

Death stones may be a reminder of mortality, but that doesn’t mean that they should be kept hidden away. Future generations of the family will likely take an interest in the family death stones if they are preserved through photographs. This may lead future generations of the family to take an interest in family history, and in learning the stories and family memories behind the names engraved on the stones.

Taking family photographs of your family’s death stones is important. The above reasons should help convince you to begin taking photos of the death stones in your family so that the current and future generations can preserve them.  

To discover what good things you have learned from your parents click here.

To discover whether we should record dark family histories click here.

To learn how to back up our old photographs click here.

To learn more about the Trafalgar Cemetery, Gibraltar, click here.

The dilemma that is recording dark family history secrets. 

Dark family history secrets.  Should we record them? 

The dilemma that is recording dark family history secrets. 

It’s important to preserve family history for future generations, so that they can share family memories and know about who they are and where they came from. But what do you do when the family history has some dark family secrets in its midst? Do you record and preserve them? Or keep them hidden? The following guide will take a closer look at what to do when your family history has some dark family secrets inside.

Family Secrets—The Darker Side of Family History

Not all family history and family memories are positive. Some family secrets may be dark or even painful. For instance, a beloved uncle may have cheated on his wife and had a secret love child; or another family member may have led a double life that no one knew about. Every family has its secrets, but the question remains: should these secrets be recorded or kept hidden until they eventually fade from collective memory?

Should We Record Darker Family History? Pros and Cons

There is no easy answer in regards to whether or not family secrets should be recorded. The following are the pros and cons of recording the darker side of family history. These pros and cons should help you to make an informed decision.

Yes, We Should Record Them

The argument for recording family secrets is that they are an important part of family history, and that future generations deserve to know the truth about their family members. In some cases, the family secrets may involve “hidden” family members (such as half-siblings from an affair, siblings who were adopted out, and so on) which can be important for family members to know. In other cases, the family secrets could have medical implications—such as a history of depression or even suicide in the family; if this is recorded, it can give future generations a heads-up in regards to keeping an eye on their mental health. 

No, We Shouldn’t Record Them

The argument against recording family secrets is that they were made secret for a reason and that recording them and drudging them up will only hurt people in the process. Dark family secrets may not have any benefit for the family, particularly in regards to some family members having affairs or double lives that don’t technically impact anyone else. In some cases, the secrets could even have consequences; for instance, “secret” children may have a claim to their parent’s estate or financial holdings after they pass.

If the secret is particularly dark, then it may be more harmful than helpful to record it and expose it for other family members (or even the world) to know.

Final Thoughts

There is no easy answer as to whether or not you should record dark family secrets and preserve them, or let them fade away with time. Hopefully, the above guide will give you some food for thought to consider when you (and/or your family) are considering recording those family secrets which might otherwise be kept hidden.

What good things have you learnt from your parents? Click here to find out more!

Check out our 10 questions to ask your parents before it's too late! 

To learn which is the best software for doing a family tree click here.

To learn how to film your grandparent with a smart phone click here.

To learn how to trace holocaust survivors and victims in your family history click here.

To learn whether we should record the lives of our pets click here.

To learn how to research gay family history click here.